Paper & collage · Painting & print · EN
Linocut Printing: Choosing Tools, Paint and Surfaces
Plan a linocut printing project with tips on linoleum, carving gouges, paint choices and reusable blocks, alongside the original CraftsTime videos.
CraftsTime ·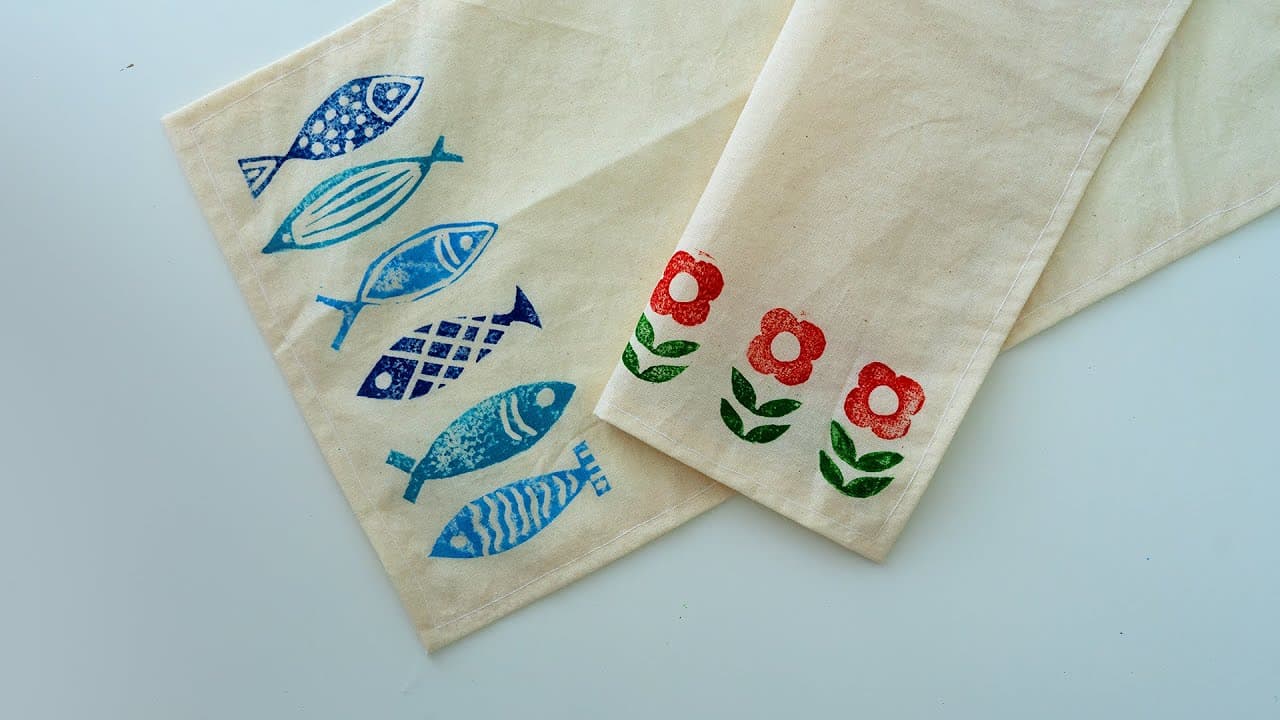
You don't need a perfectly smooth, factory-made finish for a print to work. With linocut printing, the little differences between impressions are part of what makes the result interesting. One carved block can become a print on paper, a fabric decoration or a stamp for your handmade packaging. The starting point is the same: choose what you want to print, then choose the tools and colour for that job.
This CraftsTime project introduces linoleum printing and answers the practical questions that often come before the first print. Where do you find linoleum? Which carving tool do you need? Does the same paint work for everything? Here's a way to work through those choices without buying a pile of supplies you haven't decided how to use.
Start with the surface you want to print
The source project isn't limited to fabric. It also mentions paper, cardboard, wood and walls as possible printing surfaces. That gives you plenty of directions, but choosing one first makes the rest of the project easier to plan. A stamp for a paper label and a print on a fabric item don't have the same paint or care requirements.
For a first project, you might choose a paper print or a piece of packaging you'd like to personalise. That's an optional starting idea, not a required design. Keep the intended surface in mind when you pick your paint rather than choosing a colour first and assuming it will suit whatever you find at home.
Finding linoleum and carving tools
Linoleum is also a flooring material, but for this project you're looking for linoleum sold for printmaking. CraftsTime suggests checking art and architectural-model supply shops. If local shops don't have it, searching for linoleum for printing is more specific than searching for flooring alone.
The carving tools are gouges, called مغار in Farsi. They come in different shapes and sizes, and the right choice depends on your design. The original notes point out that smaller tools are useful for fine work. That doesn't mean you need every size before you begin. Look at the detail in your intended design and use the video to see which tool is doing which job.
Match the paint to the material
For fabric, the source mentions fabric paint or acrylic paint. These are alternatives, not an instruction to mix the two together. Follow the instructions on the particular product for its suitability, fixing and washing requirements. Don't assume a printed fabric item is washable just because the paint looks dry.
For paper and cardboard, the project also mentions using a stamp pad or acrylic paint. A branding stamp for packaging is one example. The useful question is therefore not simply “Which paint is best?” but “What am I printing on, and what does this product say it can do?” Keep the answer tied to the actual material in front of you.
Give the block a comfortable backing
One practical suggestion in the source is to attach a piece of wood to the back of the linoleum. This makes the block easier to hold and helps you apply pressure across it. The wood is a support for the stamp; it isn't another printing layer.
Watch how the block is held in the original tutorial before choosing a backing for your own design. The source doesn't specify a backing size or an adhesive, so those aren't details to guess from a finished photo. The important idea is a grip that lets you handle the block comfortably and press it evenly.
Let the print look handmade
CraftsTime makes a point of the difference between hand printing and a digital print. The goal isn't necessarily an identical, completely uniform result every time. Texture and small variations can be part of the finish you're choosing.
That doesn't mean every accidental mark has to stay. It means you can judge the result against the look you actually want. If you're planning handmade packaging, for example, a slightly varied impression may suit it. If a part of the design is difficult to recognise, look at that specific area rather than treating the whole print as a failure.
Keep the block for another project
These stamps aren't intended to be single-use. The original notes describe cleaning the block with water after working so it can be used again. Check the cleaning directions for the paint you've chosen too; the source's general advice isn't a replacement for that product's instructions.
Reusing a design also gives you a reason to keep your first project focused. You might like the same motif on several paper items or decide to try another colour later. Those are optional ways to explore the block you've already made, not reasons to add more materials before you've tried it once.
Watch the carving before starting
The linked CraftsTime videos are where to follow the demonstrated tool movements and printing sequence. A list of supplies can't show hand position or the way the tool meets the linoleum. Keep your hands clear of the cutting path and follow the tool's safety instructions.
Choose your printing surface, gather suitable colour and tools, and watch the relevant demonstration with that project in mind. You'll have a much clearer idea of what to look for than if you start by trying to copy every possible version at once.
Watch the original project
reviews · 0
Reader reviews
Be the first to leave a review.

